

Ever wondered if building a professional-looking deck could besimpleand surprisingly fast—even for a first-time DIYer? The truth is, with the right strategies and some expert advice, diy deck building doesn’t have to be a daunting, drawn-out adventure. Whether you want to add a cozy spot for summer barbecues or expand your home’s living space, this guide uncovers how you can nail your project—literally and figuratively—without wasting a lot of money or time. Ready to transform your outdoor living? Let’s dig in!
Ever Wondered If DIY Deck Building Can Really Be Simple and Fast?
If you’ve ever looked at beautiful backyard decks and thought, “Could I really build that myself—and do it in just a bit of time?” The answer is a resounding yes! DIY deck building is more accessible than ever, thanks to new materials, clever building strategies, and easy-to-understand guides. Whether your goal is a simple deck for easy entertaining or a larger backyard transformation, learning the basics is key. By understanding core principles—like deck footings, using a deck pier, and perfect rim joist placement—you can tackle your own project confidently and efficiently. Not only does this save a lot of money versus hiring out, but it also means every detail is in your hands.
As you venture into the world of simple deck builds, you’ll see that planning, measuring, and choosing the right foundation options—like deck block, concrete deck, or traditional deck pier—can drastically speed up the process. With a little know-how, you eliminate expensive mistakes and complete your deck project faster than most homeowners believe possible. Get ready to dive deep into the real-world steps and professional insights that make DIY deck building so rewarding and achievable.

What You’ll Learn About DIY Deck Building
- Essential DIY deck building tools and materials
- Effective planning and measurement techniques, including rim joist placement
- Choosing between deck pier, deck footings, or deck block systems
- Step-by-step installation for front rim, side rim joist, and post base elements
- Tips for cost-saving and maximizing efficiency in your simple deck project
- Expert finishing touches to make your DIY deck building project shine
Understanding the DIY Deck Building Process: An Overview
The journey from conception to completion for a DIY deck building project is more systematic than you might think. It all starts with envisioning the scope of your new outdoor living space—whether you plan a small simple deck or want to expand your living space for family gatherings. Planning comes next, including measuring the area, marking for rim joist and side rim placement, and selecting the most suitable foundation (deck pier, deck block, or concrete deck). Each decision impacts the deck’s longevity, cost, and complexity.
Once your plan is set, you’ll gather tools and materials: everything from post base hardware and fasteners to decking boards and safety gear. The build itself rolls out in logical phases—starting with deck footings, laying the frame (front rim, front rim joist, and side rim joist), and finally installing boards and applying finishing touches. Throughout the process, it’s vital to check for level surfaces, proper spacing, and secure connections. Building a deck may seem strenuous at first, but each step provides tangible results and builds valuable hands-on confidence. With the guide below, you’ll avoid the common mistakes that slow down or complicate most DIY projects.
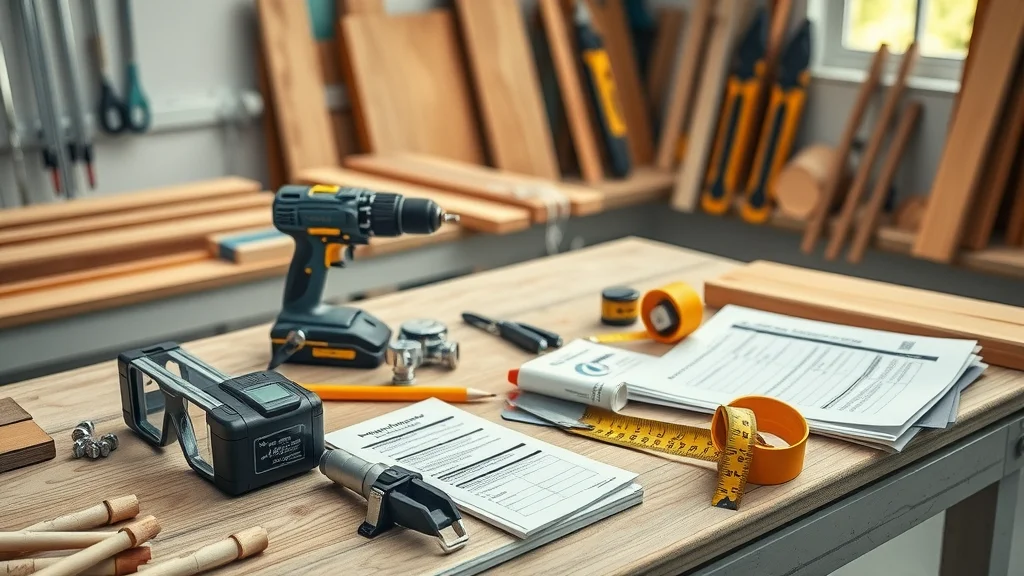
Essential Tools and Materials for Simple Deck Construction
No diy deck building project begins without assembling the right toolkit and materials. The essentials go beyond just hammers and drills: think deck footings, deck pier supports, deck blocks, and power tools. Your core shopping list should include not only lumber for the front rim, side rim joist, and front rim joist, but also galvanized post base connectors, fasteners, and safety equipment like gloves and protective eyewear. These elements guarantee a sturdy, code-compliant deck that stands up to the test of time and weather.
When comparing foundation options—deck pier systems, deck block, or concrete deck footings—each has unique strengths in terms of cost, speed, durability, and frost resistance. Power tools such as impact drivers, circular saws, and reliable drills will streamline your workflow. Additional materials (like joist hangers, weed barriers to reduce future maintenance, and joist tape for moisture protection) are highly recommend for a simple deck that lasts. In short, the secret to fast, frustration-free deck building lies in thorough prep and smart material choices.
- Deck footings and deck pier options
- Deck block and concrete deck alternatives
- Lumber: front rim, side rim joist, front rim joist
- Post base connectors and fasteners
- Power tools and safety equipment
| Feature | Deck Block | Concrete Deck | Deck Pier |
|---|---|---|---|
| Installation Speed | Fast | Medium | Slow |
| Cost | Low | Medium | High |
| Durability | Medium | High | High |
| Frost Resistance | Low | High | High |
Planning Your DIY Deck Building Project: Measurements and Layout
Careful planning is the backbone of every hassle-free deck project. Accurate measurements and a precise layout ensure every rim joist and post base fits perfectly the first time, avoiding delays that can eat up a bit of time and budget. Begin by mapping out your deck’s dimensions and selecting a location that enhances your home’s living space and workflow. Apply the classic 3-4-5 rule to achieve perfectly square corners—especially important for a simple deck that looks sharp and professional.
Mark the positions for the front rim, side rim joist, and rim joist elements using measuring strings and chalk lines. Don’t neglect to consider frost line depth in colder climates if you’re using traditional deck piers. A clear layout also simplifies every step that follows, from setting deck footings to installing the first board. As an expert wisely says:
“Precision in planning sets the foundation for a flawless DIY deck building experience.” – Industry Expert
- Map out your deck’s dimensions and location
- Apply the 3-4-5 rule for decks to ensure square corners
- Mark locations for front rim, side rim, and rim joist elements
Planning for Budget: How Much Does DIY Deck Building Cost?
One of the top questions for any diy deck building project is budget. Homeowners often wonder: is it cheaper to build your own deck? In most cases, absolutely! By opting for DIY over hiring pros, you cut out significant labor costs, keeping more money for premium materials or stylish finishing touches. You’ll still need to budget carefully for foundation types (deck block versus deck pier or concrete deck), lumber, fasteners, and protective finishes.
For perspective, a simple deck using deck blocks might set you back as little as $1,000-$2,000 for a small footprint, while a larger deck with deck pier supports and composite boards can range up to $4,000-$6,000. Always build in a margin for minor overruns—material prices fluctuate, and you may spot must-have features mid-build. Using resources like Home Depot for comparison shopping makes materials sourcing simple, and many local hardware stores offer expert tips, too. Remember: the time spent planning and budgeting up front saves you a lot of money, stress, and rework down the line.

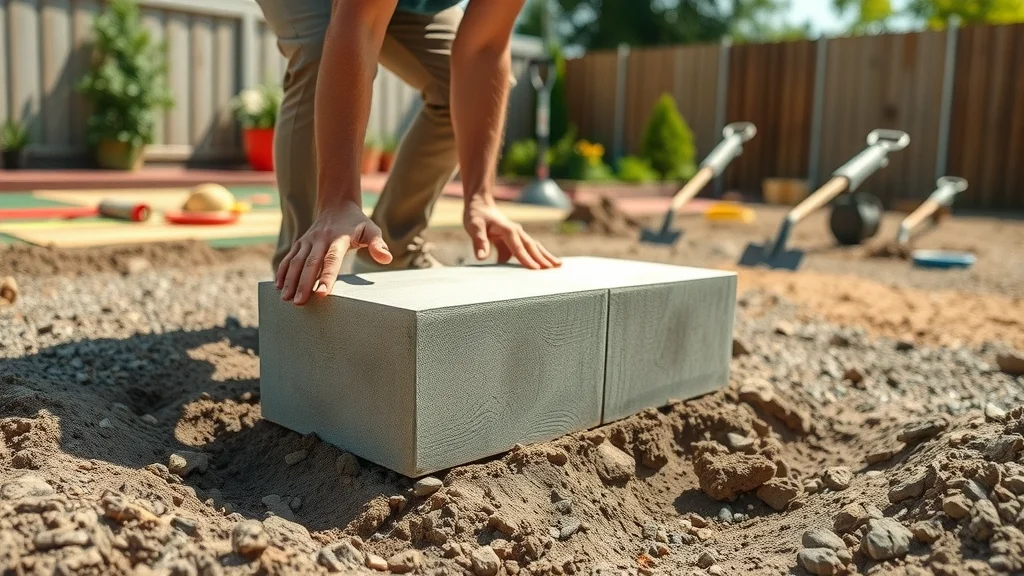
A step-by-step visual guide showing the measurement, marking, and first stages of deck building: includes walkthrough of correct deck footings placement, rim joist positioning, and essential construction tips for beginners. All activity is safe, methodical, and performed by skilled hands in proper safety gear.
Laying the Groundwork: Deck Footings, Deck Pier, and Deck Block Installation
The foundation of your deck—literally—depends on proper deck footings, deck pier supports, or deck block placement. Selecting the right system comes down to ground conditions, deck height, and frost line requirements. Deck blocks are perfect for a simple deck on stable ground, providing a quick, affordable solution that minimizes time to dry and excavation. However, for high or raised decks, or regions with deep frost, deck piers and concrete deck footings offer superior stability and code compliance. Always ensure your holes reach below the frost line to prevent seasonal heaving and instability.
Once selected, excavation and leveling are essential. Lay out strings or chalk lines, then dig or position footings where marked. Carefully set deck blocks or deck pier posts, topping them with metal post base connectors for enhanced strength. This prep phase is not where you want to rush—double-check levelness and placement for every footing or block. Secure posts with gravel or concrete as needed, and confirm all connections are tight and square. As the pros say:
“The right foundation is everything—don’t cut corners at this stage of DIY deck building!”
- Selecting between deck pier, deck block, and concrete deck options
- Excavation, leveling, and placement of deck footings
- Setting deck block and post base for stability
Framing Your Deck: Installing Rim Joist, Side Rim Joist, and Front Rim
With deck footings or deck blocks installed, the next step in your diy deck building journey is framing. Start by fastening the front rim and side rim using accurate, square measurements from your previous layout. The rim joist is the main structural member spanning the front of your simple deck, tying together each side rim joist for stability and strength. Use deck screws or specialized fasteners to ensure tight, wobble-free construction, and reinforce connections with post base hardware at each intersection.
After the perimeter is established, install the front rim joist and additional deck joists, spacing them uniformly according to deck board length and material specs (typically 16″ on center). Joist hangers add support and are highly recommend for preventing sagging or movement—a critical step for long-term durability. Precision here means straighter boards, less rework, and fewer issues when it’s time to add finishing touches. Check that every joist is level, square, and tied solidly into post bases and ledger board (if used for house-framed decks).
- Attaching front rim and side rim using precise measurements
- Securing the rim joist and front rim joist
- Ensuring correct spacing and stability with post base hardware
Follow this detailed walkthrough to see how professional builders install the rim joist, front rim joist, and side rim connections, complete with safety tips and easy-to-replicate measuring techniques for any deck size.
Building the Deck Surface: Boards, Fasteners, and Layout
Now comes the most satisfying phase of diy deck building: installing the deck boards and seeing your project take shape. Choose high-quality, weather-resistant boards sized to your preferred board length; popular options include pressure-treated lumber or composite decking. Lay your first board flush with the outside edge of the front rim joist, using spacers to maintain even, professional-looking gaps for drainage and expansion. Secure each board using corrosion-resistant fasteners or hidden clips to prevent unsightly nails or screws.
Continue working row by row, using a chalk line or straight edge to keep boards aligned perfectly parallel with the front rim. This not only looks better but also extends the life of your simple deck by minimizing warp and movement over time. Check and adjust spacing as you go—tight spacing can lead to puddling, while wide gaps catch debris and feel awkward underfoot. Be sure to stagger joints for added visual interest and strength. A power drill, impact driver, and a steady hand make installation quick while ensuring every board is flush and secure.

- Selecting durable decking materials
- Best practices for board spacing and fastener placement
- Tips for keeping deck boards properly aligned during DIY deck building
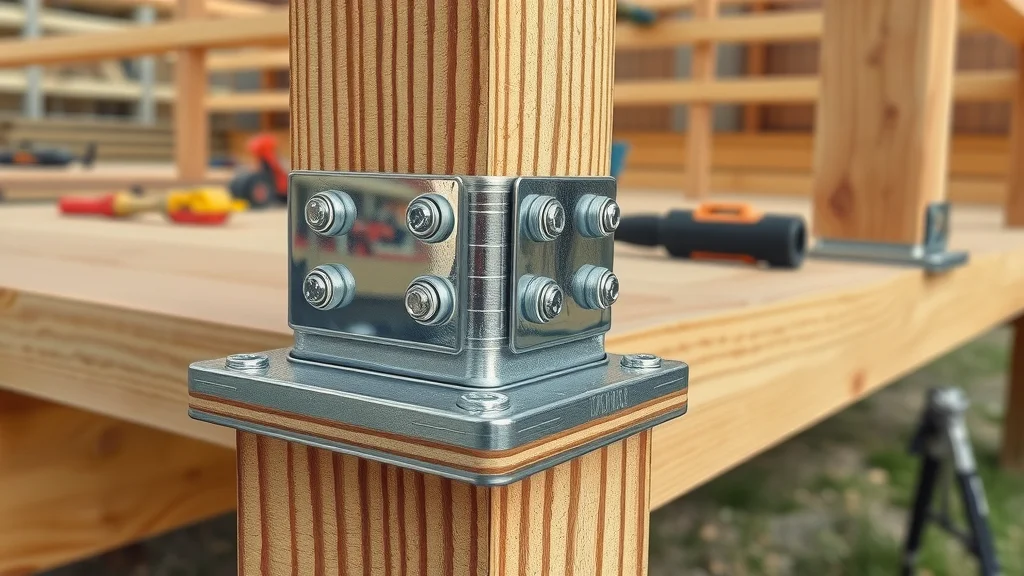
Post Base and Structural Stability: Safety in DIY Deck Building
One often overlooked, yet essential, aspect of DIY deck building is structural safety—specifically the role of post base connectors. These metal anchors are designed to secure your posts to deck footings, deck blocks, or deck piers, providing critical resistance against uplift, shifting, and moisture damage. Always check local building codes for post base requirements, as compliance ensures your deck is safe for years of outdoor living.
Additionally, carefully inspect each post base for tightness and secure all bolts or lag screws before moving forward. Using structural connectors, joist hangers, and proper bracing minimizes wobble and creates a solid foundation. Remember, structural integrity is not an area to skimp—taking the time to get every post base correct means your deck will hold up under heavy loads and dynamic weather. Consider it an investment in both your family’s safety and the value of your outdoor space.
Finishing Touches: Completing Your Simple Deck
The final stage of any successful diy deck building project is adding those finishing touches that set your deck apart. Start with properly installed railings and steps, which offer both safety and a polished look. Opt for weatherproof stains or sealants to protect your new deck from moisture, UV rays, and insects—these protective treatments prolong the life of decking boards and keep colors vivid over time. Don’t overlook small details, such as sanding rough edges or camouflaging fasteners for a professional finish.
Before considering your project done, inspect all aspects for code compliance and structural safety. Tighten any loose screws, confirm post bases are solid, and examine railing connections. Clean up debris, and celebrate your new outdoor living space with family and friends. With careful attention at every step, your simple deck will stand as a testament to what a smart DIYer can achieve, adding both beauty and value to your home.
- Installing railings and steps
- Choosing weatherproof finishes and protective treatments
- Inspecting final construction for code compliance
People Also Ask: Common DIY Deck Building Questions
What is the 3 4 5 rule for decks?
The 3-4-5 rule is a classic carpenter’s trick for ensuring your deck corners are perfectly square. Start by measuring 3 feet along one side of your planned corner, then 4 feet on the adjacent side. The diagonal between these two points should measure exactly 5 feet—a triangle with a 90-degree angle. This keeps rim joist and side rim joist framing aligned correctly for a flawless, professional appearance and secure deck board installation.
Is it cheaper to build your own deck?
Yes—one of the biggest appeals of diy deck building is cutting out labor costs, which can be the largest expense in professional installs. By sourcing materials yourself and putting in a bit of time, you’ll save a lot of money on a simple deck. However, always budget for quality hardware (like post base connectors and fasteners) and reliable materials for deck joists and rim joist support, as skimping here can cost more over time.
How much does it cost to build a 20×20 deck?
Costs vary by material and region, but for a typical 20×20 simple deck, expenses range from $3,000–$6,000 for basic lumber and deck block or pier foundations. Composite materials and complex designs can drive costs higher. You’ll need to account for deck footings, fasteners, joist hangers, board length, and all finishing touches to get an accurate figure.
What is the most inexpensive way to build a deck?
The lowest-cost diy deck building method is using deck blocks as your footing system, with pressure-treated lumber for the frame and deck boards. Avoiding elaborate railings, stairs, and using standard board sizes also keeps prices down. Always compare local lumber yards and Home Depot supplies for best prices—sometimes buying in bulk saves even more money.
FAQs About DIY Deck Building
- Can I build a deck without a permit? Most localities require a permit if your deck is over a certain size or attached to the home. Check with your building department before starting to avoid costly rework or fines.
- What’s the safest way to anchor a DIY deck to my house? Use a ledger board securely fastened to a solid structural member of the house, with proper flashing to prevent moisture damage. Always follow code for fastener size and spacing.
- How long does DIY deck building take for beginners? With thorough planning and help from a friend, most simple deck builds can be completed over 2–3 weekends, including time to dry for concrete or finishes. Complex multi-level decks may require more time.
Key Takeaways from Your DIY Deck Building Journey
- Thorough planning and correct installation of rim joist, deck pier, and post base hardware are critical
- Cost savings are best achieved with efficient materials and a simple deck design
- Finishing touches and safety checks elevate your project from good to great
Ready to Start Your DIY Deck Building Project?
Local Business In the Eustis Area? Reach out to us to advertise and reach thousands of local home owners!
Conclusion
With smart planning, quality materials, and careful assembly, DIY deck building will transform your outdoor space into a lasting highlight of your home.
Sources